
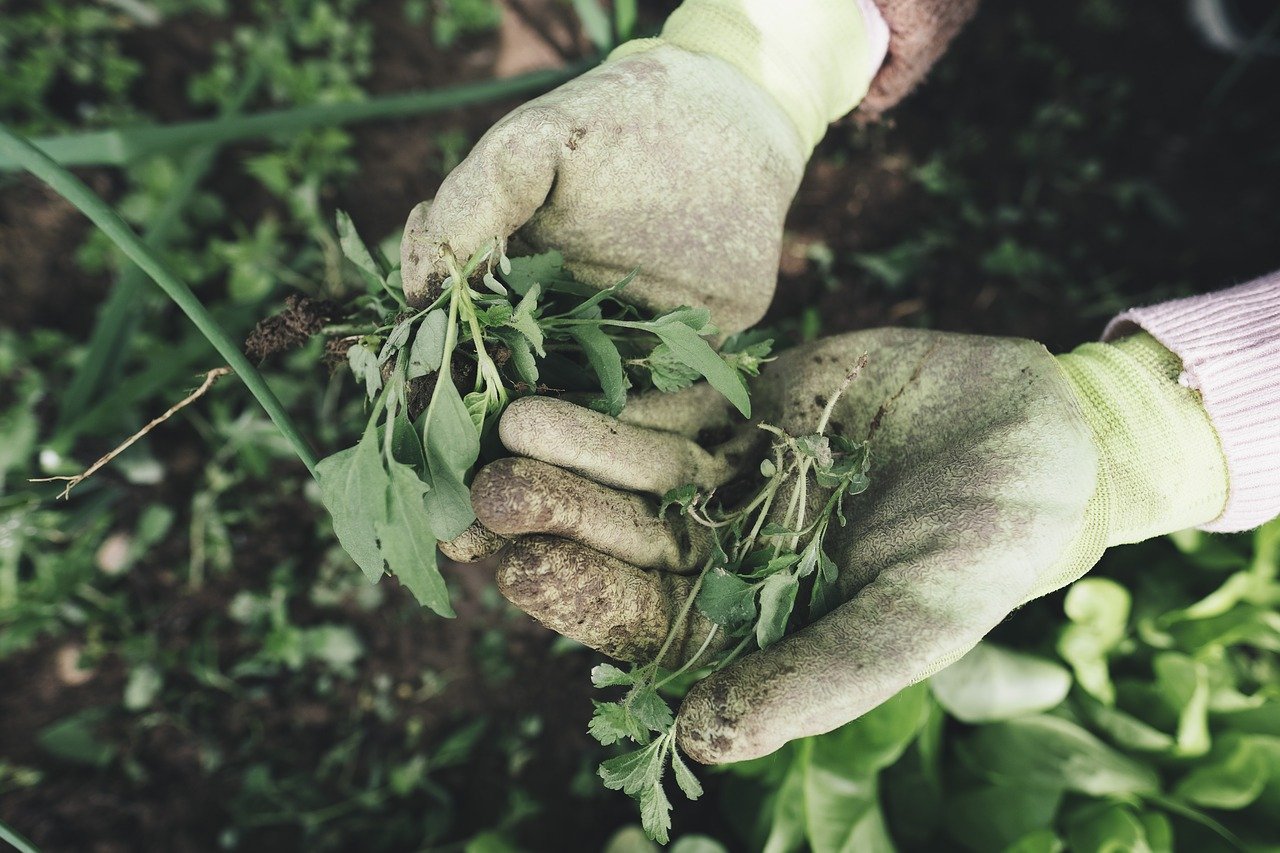
After transplanting your seedlings into the garden, the hard work is over right? You can breathe a sigh of relief? Well, maybe for a second, enjoy the fruits of your labour and all. But after that brief moment of joy, it’s time to start thinking about weeds, specifically weed control.
So, how can you keep a one-acre garden weed free without using harmful chemicals?
That’s what this article is all about!
As you may or may not know, weeds compete with vegetables for water, nutrients, and growing space, so despite wanting a harmonious balance in your garden, it just is not realistic if you want to sell vegetables for a living.
For weed management practices to be both ecological and sustainable, a market gardener should be carefully planning for weed prevention and follow with effective and efficient weed control strategies.
Effectively dominating weeds in an organic way takes persistence, the right tools, and innovative technology.
Since this is our first year as market gardeners, we have not developed our own weed strategy yet, so I will be following the sound advice from J.M. Fortier in the market gardener.
Preventative Measures
There are a few things you can routinely do that help minimize weeds in your market garden.
1. Tightly Space Your Crops: When you tightly space your crops, you not only maximize the yields but also reduce weed growth.
Closely spaced plants growing together quickly form a leafy canopy that shades out weeds.
This benefit alone might just be the best reason for adopting an intensive approach to growing veggies.
2. Employing weed-free compost and adopting tillage tools that don’t invert the soil also helps with weed control.
3. Transplanting as many crops as possible help keep weeds in check.
All of these preventative measures help to fend off invasive garden weeds, but they are not enough to keep them at bay indefinitely.
There’s no getting around it, you will always have to deal with ground popping weeds attempting to take over your crops.
Cultivating with Hoes
The bigger the weeds get, the more difficult they are to control.
The most effective way to deal with weeds is to get them before they get well established, at a stage when lightly disturbing the soil is enough to kill them.
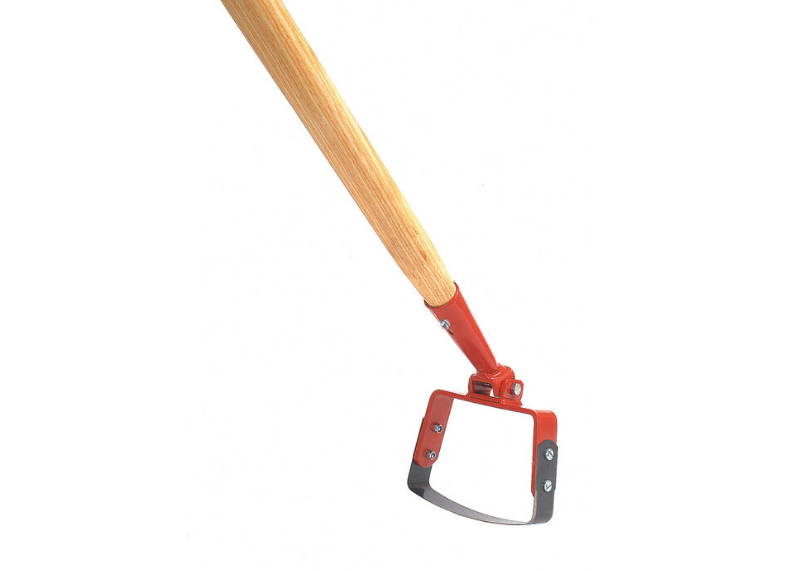
For a market gardener, the hoe is the best tool for the job.
Long-handled stirrup hoes with a swiveling, double-sided cutting blade are the best for cutting through weeds just below the soil surface.
This can be done on both the pulling and the pushing motion, so hoeing is very fast, efficient, and ergonomic.
Narrower stirrup hoes (3 ¼”) can be used for crops planted in four or five rows per bed and wider ones (5”) for crops grown in two or three rows.
You can also use a wheel hoe with a very wide blade (12”) to hoe crops grown in just one row and to weed pathways.
Eliot Coleman developed the collinear hoe which is useful for weeding mature crops because the blade can reach right around the base of the plant stems without damaging the leaves.
Maintenance Schedule
Gardens should be hoed every 10-15 days, especially during June and July, when weeds are persistent and in direct competition with crops.
It’s important to cultivate under good weather. If the soil is wet, any weeds hoed might re-root and you will have to do the same job again later.
The best time to hoe is on a dry, sunny day, so try to plan for that as best you can.
It’s also good practice to keep your hoes sharpened. This makes a big difference in terms of efficiency.
You want the hoe not only to disturb the weed but to slice the roots of the uprooted plants.
Sharpening hoe blades once a week with an electric grinder as well as carrying a handheld carbide sharpener while hoeing in the garden is a good practice to follow.
Take the time while hoeing your crops to get a good feel for what is happening in your garden.
It is a good time to develop your botanical acuteness and sensitivity. You will be able to see your plants develop at every stage and this will only increase your knowledge and skills as a market gardener.
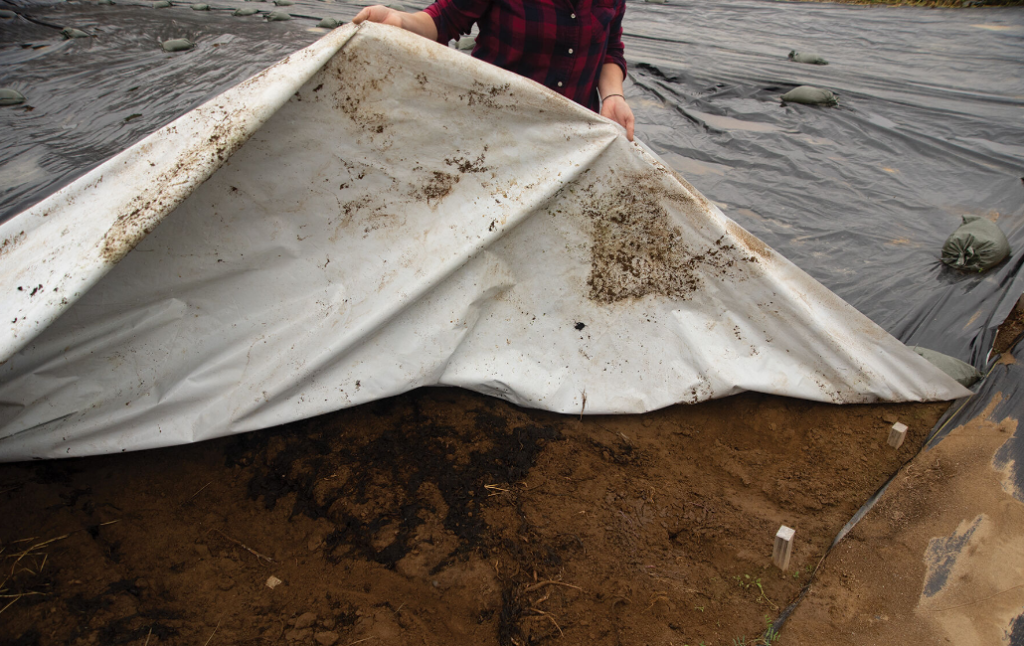
Weeding with Tarps
UV opaque tarps come in handy when you have a large space to keep weed-free.
Tarps are useful for smothering weedy ground and preparing the soil before planting, as well as for covering unused beds. The tarp limits the surface area on which weeds can establish themselves.
J.M. has also observed that black tarps do a good job of diminishing weed pressure on subsequent crops. This is because weeds germinate in the warm, moist conditions created by the tarp but are then killed by the absence of light.
This weeding technique is called occultation and is widely used by organic growers in Europe.
Stale Seebed Technique
The stale seedbed technique consists of preparing seedbed a few weeks prior to the seeding date, allowing weed seeds in the top 2” of the soil to germinate.
When ready to seed, directly or transplanting, the soil surface is then shallowly worked again, effectively destroying emerging weeds.
The result is that the crop can get a head start over the weeds yet to come, and the difference between beds that have received the treatment and those that have not is striking.
There are a few things to consider for this technique to be effective:
- Let the beds go stale long enough for the weed seeds to germinate. You can prepare them 15 days in advance and cover the beds with floating row covers.
- The destruction of the emerging weeds must be done in such a way as to not bring up weed seeds that haven’t germinated. A quick surface passage with a power harrow does a great job, as well as using a wheel hoe. To avoid stirring of the soil, a flame weeder can also be used.
This is a great method to incorporate into your crop planning calendar. It’s a simple technique that gives tangible results and is especially good for direct-seeded crops.
Flame Weeding
Flame weeding is a technique in which weeds are killed by burning them with a blowtorch. The weeds are not burned to a crisp but rather subjected to a form of heat shock that causes damage at their cellular level.
Two conditions must be present in order for the flame weeding to be effective:
- The flames of the torch must actually make contact with the soil.
- The weeds must be small enough that a single second of flame exposure is enough to kill them.
It’s also important to flame over a very smooth seedbed since irregularities in the surface of the soil can sometimes deflect heat from the flame weeder, giving some protection to weed seedlings.
Flame weeding is a good complement to the stale seedbed technique. Burning the weeds avoids the need for the stirring action of a harrow, thus preventing buried seeds from being worked up to the surface.
Pre-emergence Technique
This technique is somewhat like the stale seedbed technique:
1. Seedbeds are prepared 2 weeks in advance to give weeds a head start, but instead of seeding after the destruction of the weeds, you seed into the stale bed halfway through the process.
2. Then, just before the veggie plants emerge from the soil, the flame weeder is run over the ground, leaving the crop to emerge into an essentially weed-free bed.
Pre-emergence burning is the ultimate way of providing weed-free beds for slow germinating crops that are direct seeded such as carrots, beets, and parsnips.
However, this must be practiced with diligence. If you wait too long to burn the weeds and the veggie begins to emerge, the crop will be totally invaded by weeds.
If this happens, you will need to spend many hours weeding by hand or perhaps have to reseed altogether, delaying the crop by a few weeks.
To avoid this, throw a handful of seeds that are known to germinate earlier than the main crop at the head of the seedbed.
For example, a patch of tiny radish plants signals that beets are about to pop up, while tiny beet tips indicate that carrot crop is imminent.
The appearance of the indicator crop tells you exactly when to flame weed so that you can do so in confidence.
Make sure to write a note on your crop calendar to remind you to check on the plants five days after the main crops have been direct-seeded. It’s better to burn too early than too late.

Mulching
Using organic mulch might sound like the thing to use for an organic farm, however using straw, leaves, woodchips, etc. can attract slugs, and weeds always seem to find a way up through them.
For this reason, J.M. recommends using inorganic mulches such as landscape fabric and biodegradable film.
These are used to cover beds of certain veggies that stay in the garden for a long time, such as tomatoes, peppers, zucchinis, and melons.
Inorganic mulches not only smother weeds but also provide a highly beneficial environment for these crops, which prefer hot and humid conditions. Both products have their advantages and disadvantages.
Landscape Fabric
Landscape fabric is reusable and durable.
They come in rolls of a width that will cover both beds and pathways. J.M. uses 16 ft. wide rolls that can cover four beds and have burned round holes according to the crop he intends to cover.
To make the holes, use a small propane torch. Use a plywood template to give the proper spacing.
Burning more than 100 holes in this way is not an easy job but once done, the work remains useful for many years to come.
If landscape fabric is cut, the new ends should be burned to avoid unraveling of the fabric.
Purchase a professional grade landscape cloth since the thickness of the fabric and the tightness of the weave will affect how long it lasts.
Biodegradable Plastic Film
This is a lot less expensive and more versatile than landscape fabric. It allows you to punch holes at any desired spacing.
You can purchase ones made from 100% biodegradable material such as compostable genetically unmodified cornstarch resin.
Since it leaves no toxic residue, you can mix it into the soil with a clear conscience at the end of the season.
It comes in a 500 ft. roll and is 36” wide.
This mulch is rather fragile but is still preferred to the conventional plastic mulch which ends up in the garbage after the crop has been harvested.
Bottom Line
There are many different techniques that help protect your gardens from weeds, including:
- Intensive spacing
- Transplanting
- Not turning the soil
- Never letting weeds go to seed
- Using inorganic mulches
- Flame weeding
All of these processes are relatively inexpensive, however, they do require forethought and planning to be effectively executed.
Spend the time when you are crop planning to organize and plan for weed management as well.
It’s best to be prepared than to be left with gardens full of weeds that will inevitably take more time to get rid of than if you had planned for them in the first place.
What’s your #1 management strategy for weeds? Let us know in the comments below.
Stay Local,
Kathy & Jon
your friendly neighbourhood growers
0 Comments